Welcome to Vcard WordPress Theme! We would like to thank you for choosing our theme - Vcard.
Vcard - CV · Portfolio — A premium tool to promote yourself. Ideal WordPress theme for any type of profession as for creative studios and companies, perfectly suits for placing information about your experience, skills, education, works and expertise.
Requirements
There are system requirements in order to install and setup Vcard theme and its components properly. Make sure that you are running the latest version of WordPress, PHP, MySQL.
Minimum requirements:
Wordpress 6.0 or higher;
PHP 7.4 or higher;
Database: MySQL 5.015 or higher (An alternative is MariaDB, version 10.1 or higher);
Disk space: At least 1 GB.
WP Memory limit of 256 MB (Elementor and Elementor Pro only), 512 MB recommended, 768 MB for best performance.;
Note: These requirements are for Elementor. If you are using additional plugins on your site that also have minimum requirements such as WooCommerce, you may need to increase your memory to 512 MB to help avoid loading issues. See also, the following documentation Elementor Widget Panel Not Loading.
If your website is hosted by WP Engine, you might need to add SSL to your website to avoid saving issues.
If you use SiteGround or GoDaddy, make sure that they modify the SubstituteMaxLineLength of your server for you
What's Included
The contents of the theme package downloaded from ThemeForest:
vcard.zip - An Installable WordPress Theme zip file. this file you need to upload to WordPress.
vcard-child.zip - This file contains the basic child theme that you can use with our theme. Just installing it won’t hurt and in case you decide to make some changes/extend the source code of the theme, it will be very helpful because it helps not to lose your custom changes after updating the parent theme. More on child themes
Demo Content - This folder contains the demo content file which will help you to import the demo manually.
Licensing - This folder contains the terms and conditions of the license.
Documentation - The documentation contains a detailed description of how to install and use the theme.
WordPress Installation
For detailed instructions on how to install WordPress on your hosting, you can read the link below: How to install WordPress
Installing the theme
Important! if you download the All Files archive from ThemeForest and try to upload it to your WordPress, you will receive this error: Theme is missing the style.css stylesheet. Please make sure you unzipped the main archive and are uploading the correct file to your WordPress.
When you are ready to install a theme, you must first upload the theme files and then activate the theme itself. The theme files can be uploaded in two ways:
1. Using Theme Uploader
Follow the steps as instructed in the images below:
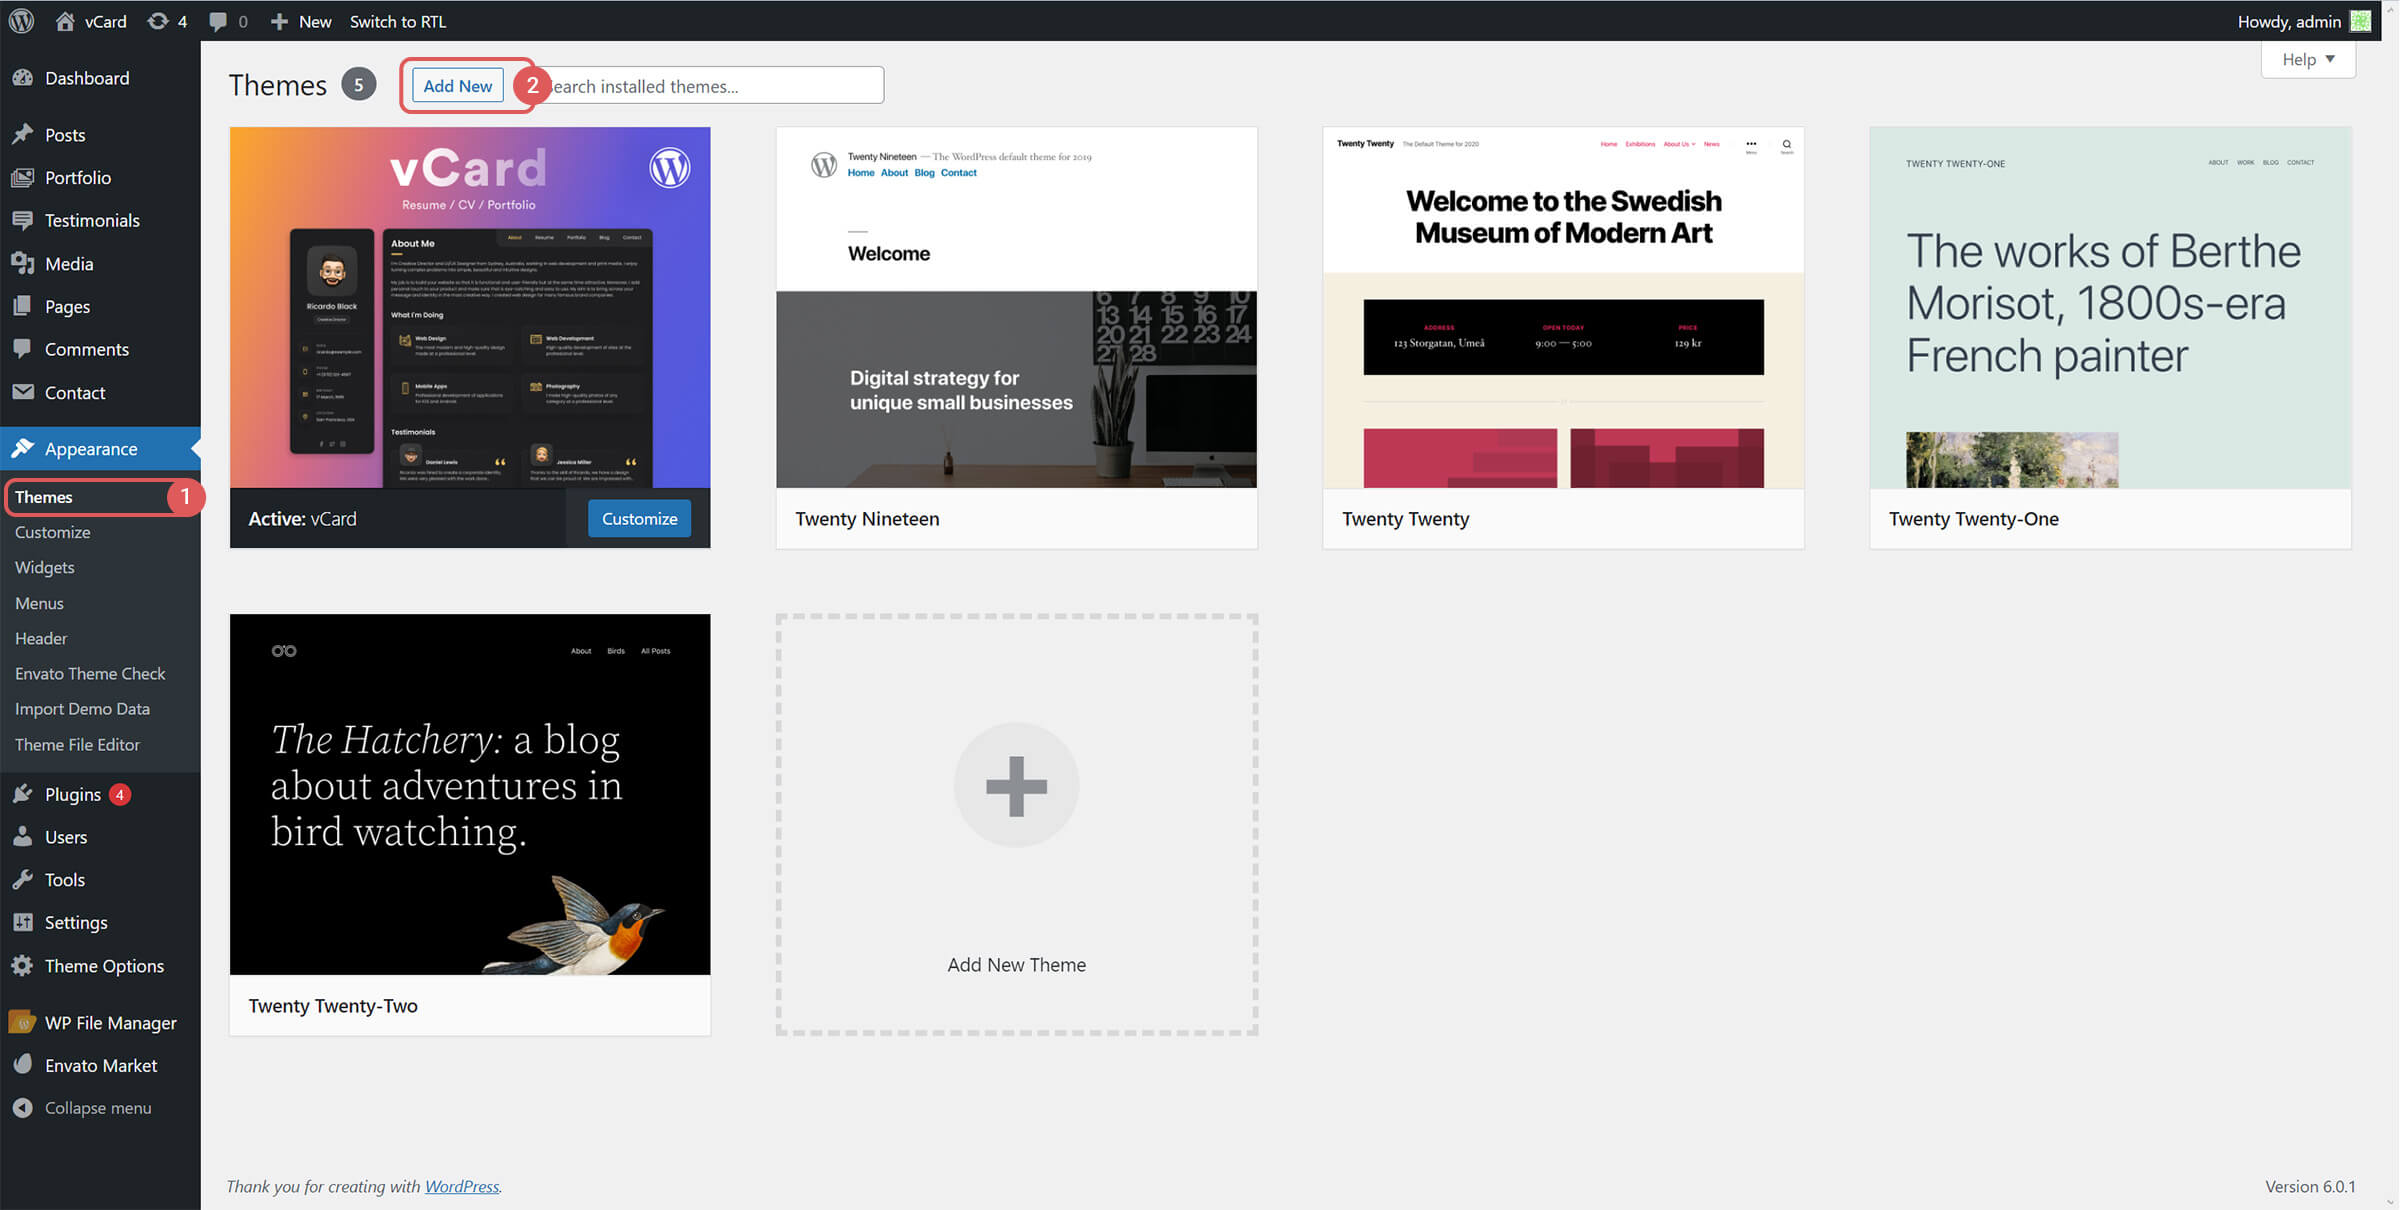
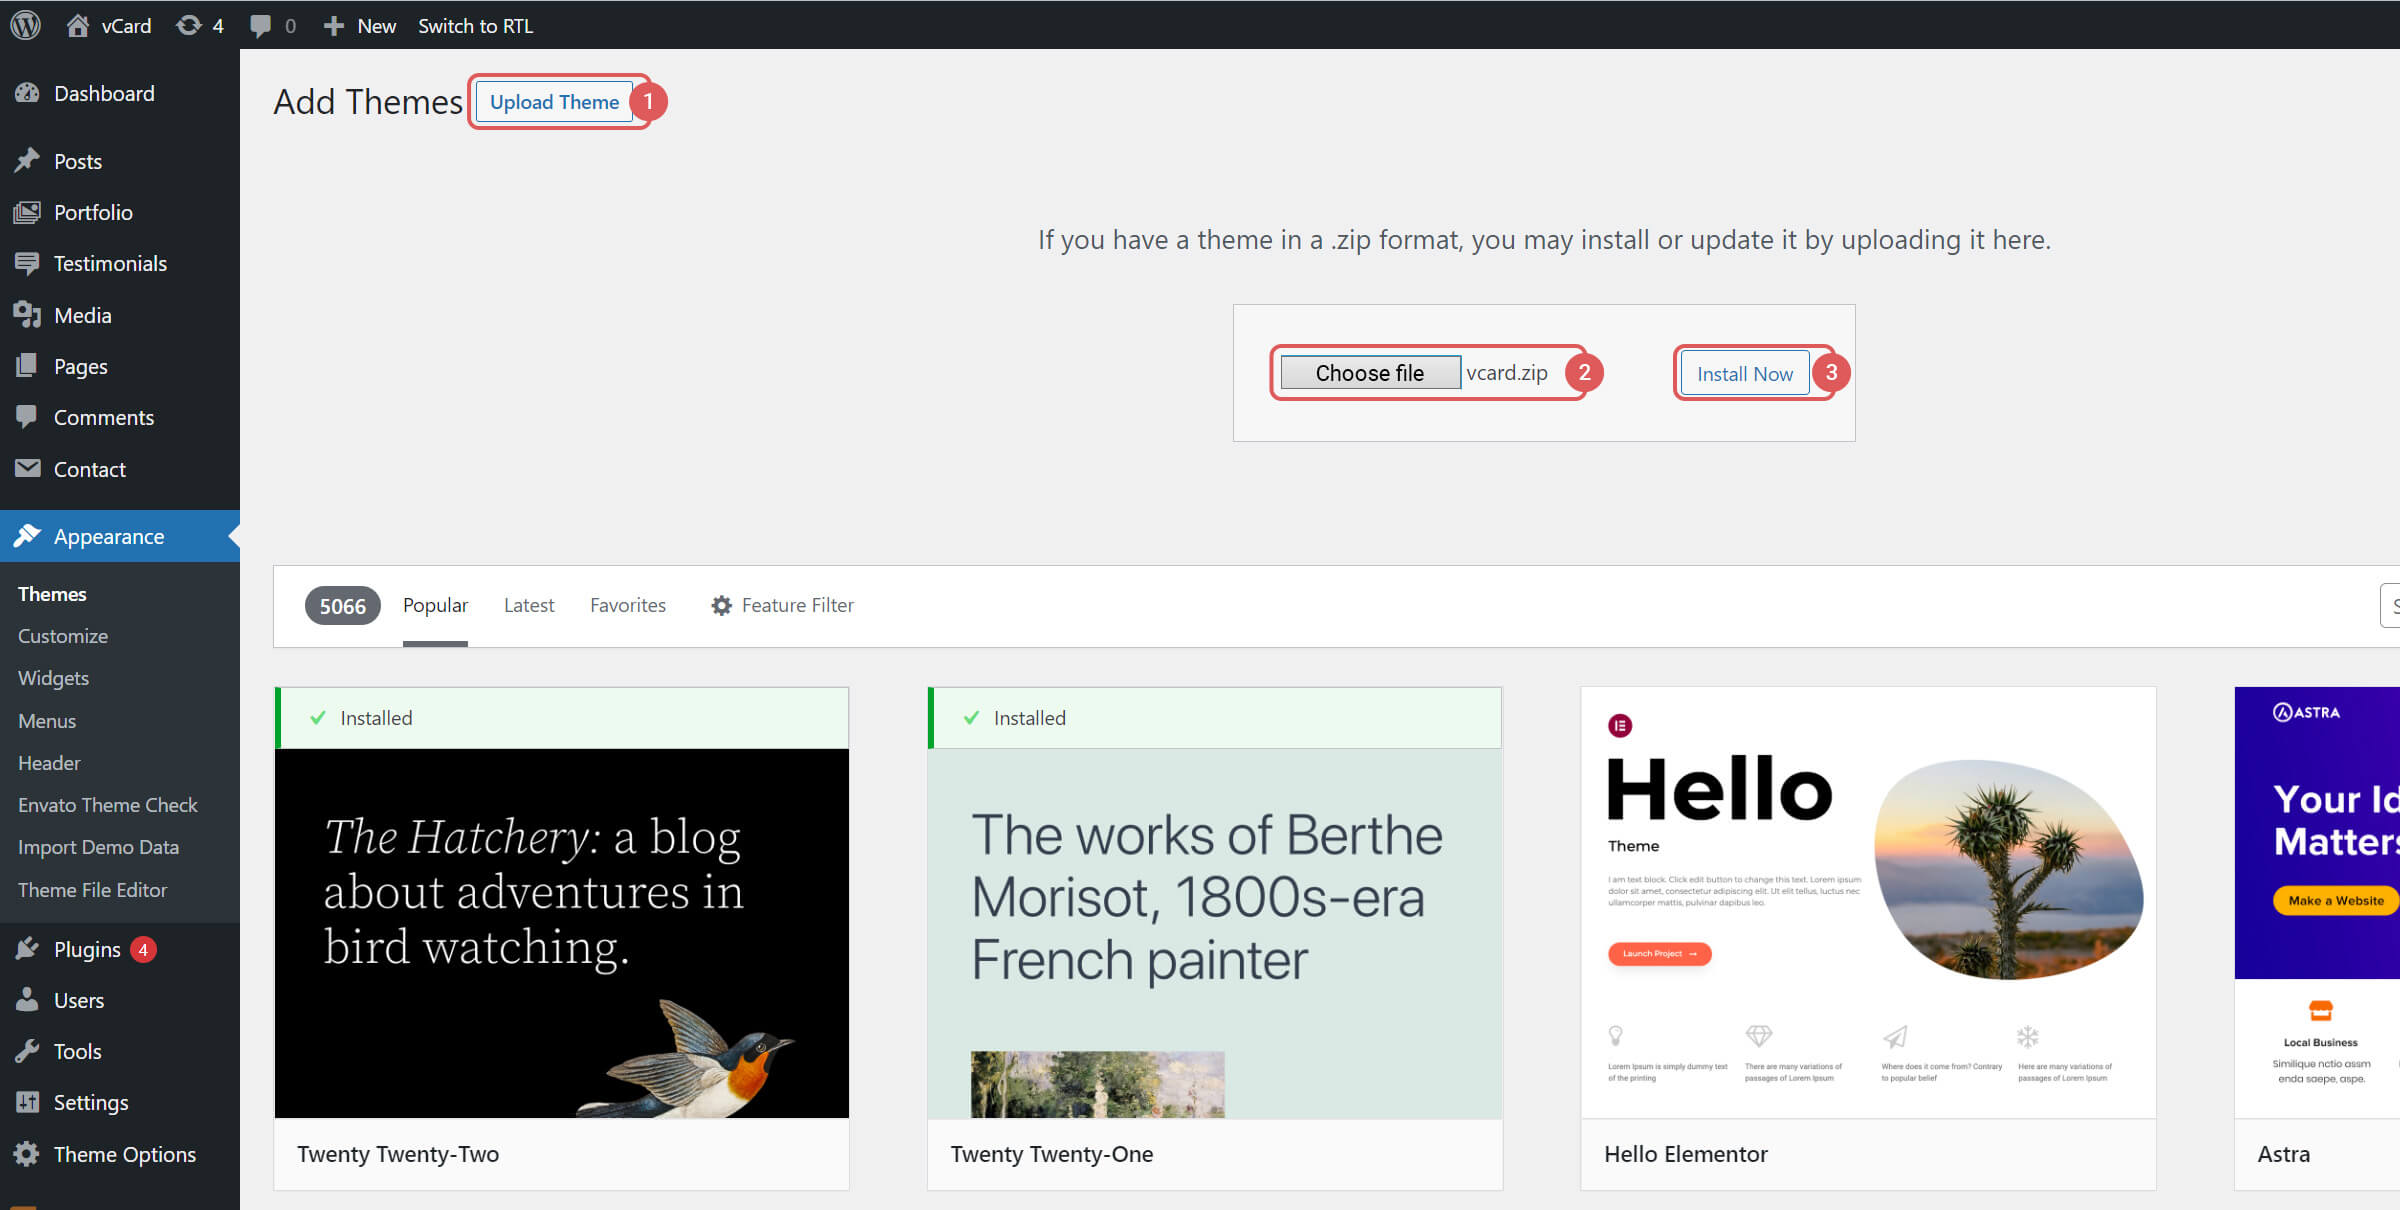
From the dashboard go to AppearanceThemesAdd NewUpload Theme
Click on “Choose File” and select vcard.zip;
Click on “Install Now”.
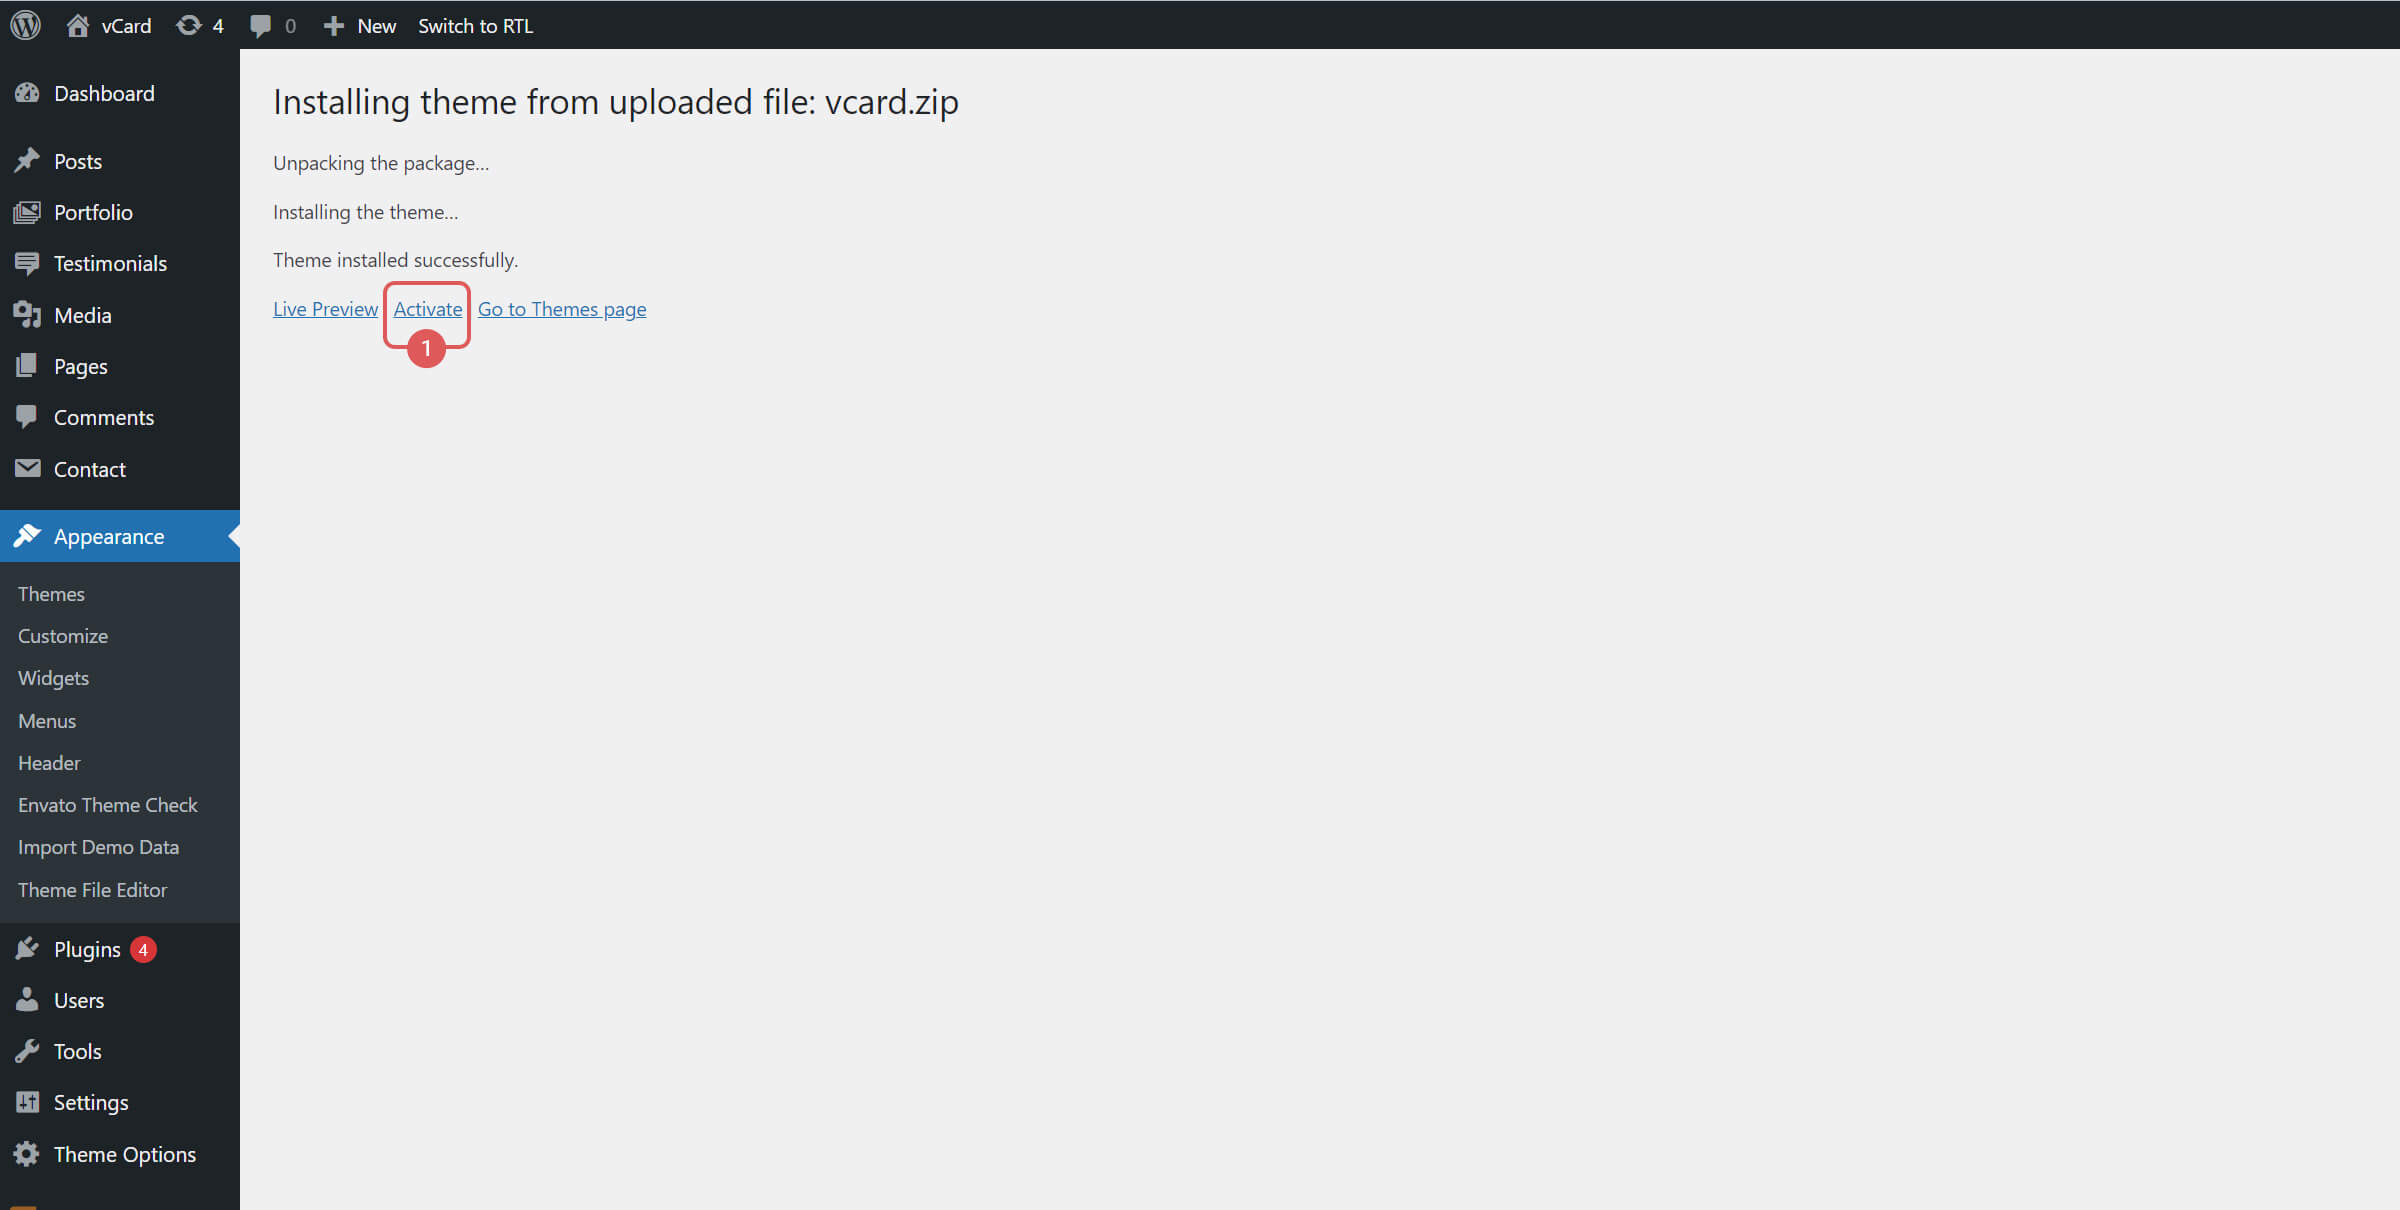
After the theme has been successfully uploaded, click Activate
Then follow the simple, step-by-step instructions that are on your screen. This step will install all the necessary theme plugins and demo content.
Appearance → Themes → Add NewClick on “Choose File” and select vcard.zip and Click on “Install Now”.Active Vcard Theme
2. Using FTP Clients
Follow the following steps to upload your theme using FTP clients:
Use an FTP such as FileZilla and go to your WordPress installation director
Navigate to /wp-content/themes/ folder and upload the theme folder there
Log in to your WP Admin Dashboard and open the AppearanceThemes menu
You will now see Vcard Theme listed among the other themes. Click on Activate and you’re done!
3. Updating the theme
We recommend that you use the Envato Market plugin to keep the theme up-to-date.
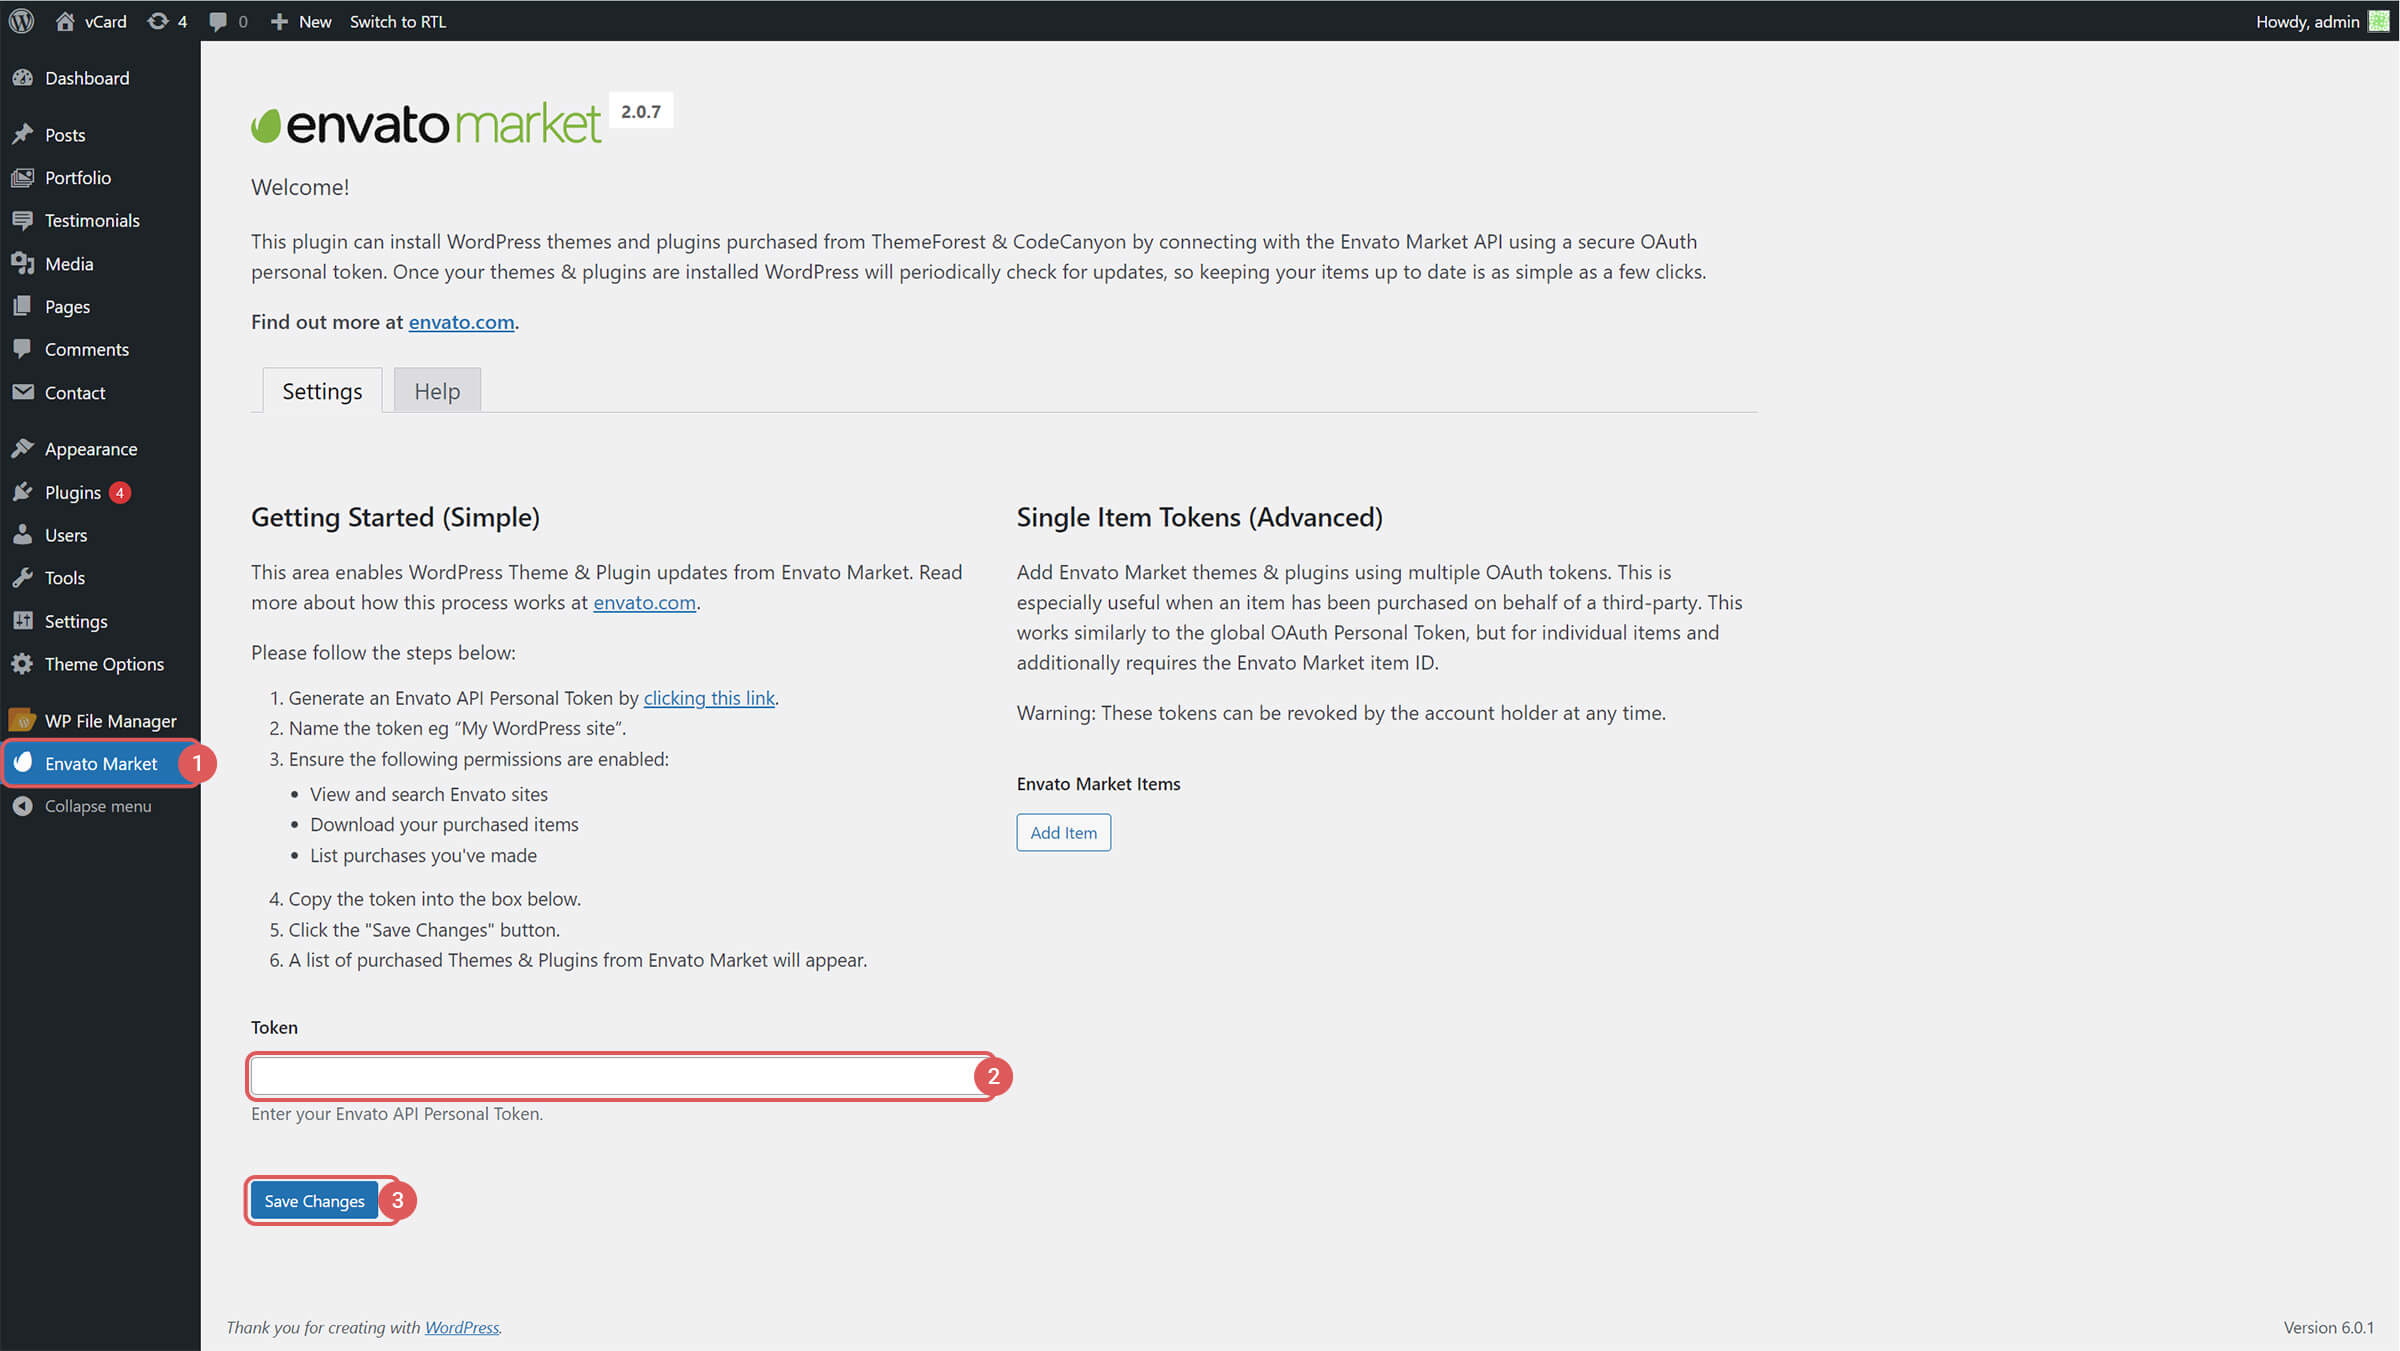
Once installed, you should see an Envato Market menu on the admin sidebar. Click on it.
Enter your Envato API Personal Token in the Token field. If you don’t have an API token you can create one here or click on the generate a personal token link on that page.
Once you have pasted your token in the Token field, click on Save Changes.
Should your token be correct, two extra tabs are now available on your Envato Market page. Click on the Plugins tab.
Enter your Envato API Personal Token.
If an update is available for the Vcard Theme, click on the Update Available link, which should start installing your update.
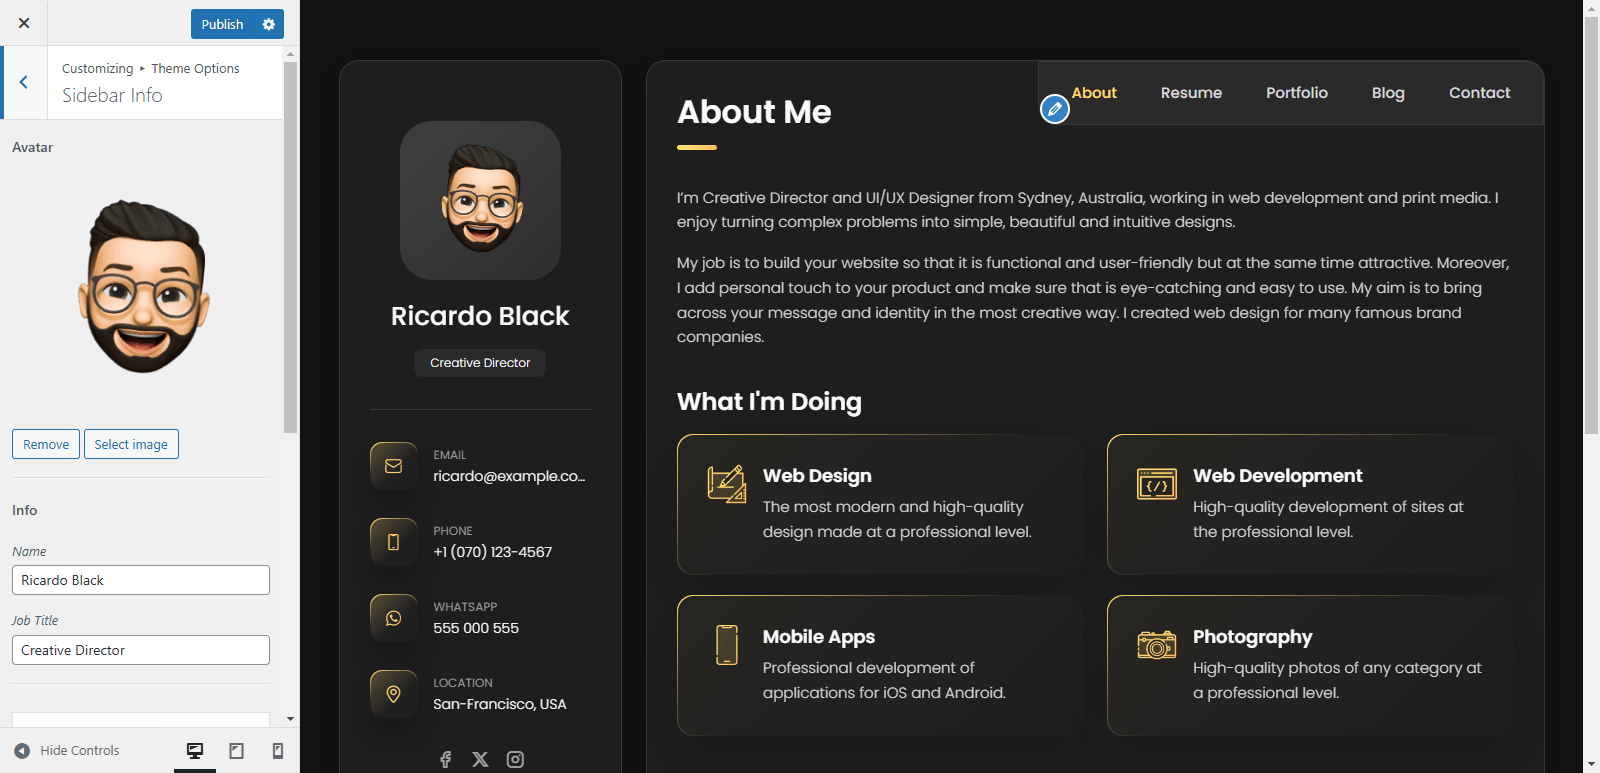
To change the information in the Sidebar, go to DashboardAppearanceCustomizeTheme OptionsSidebar Info
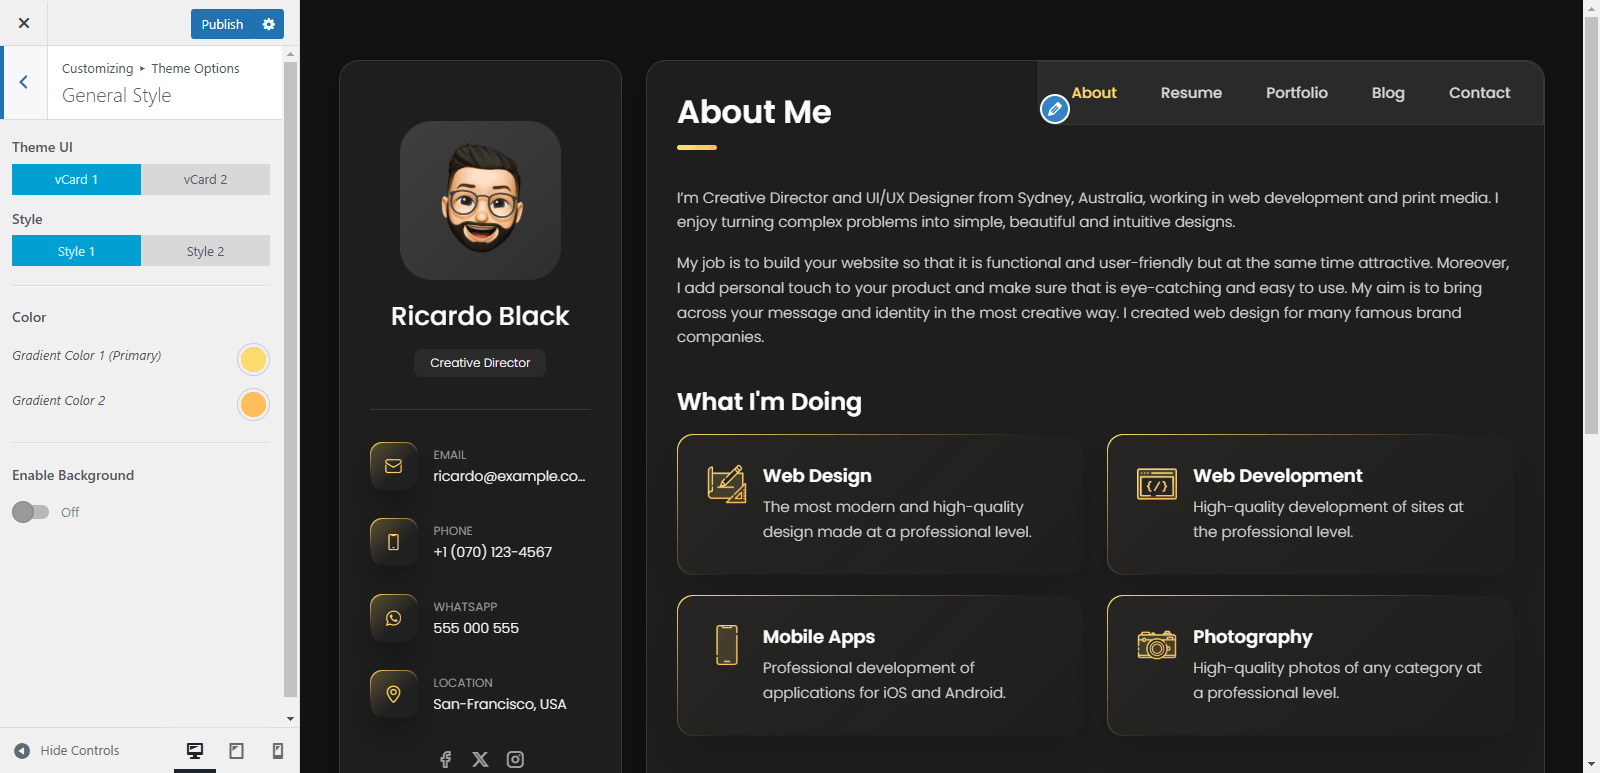
General Style
To change the style and color palette, go to DashboardAppearanceCustomizeTheme OptionsGeneral Style
Options
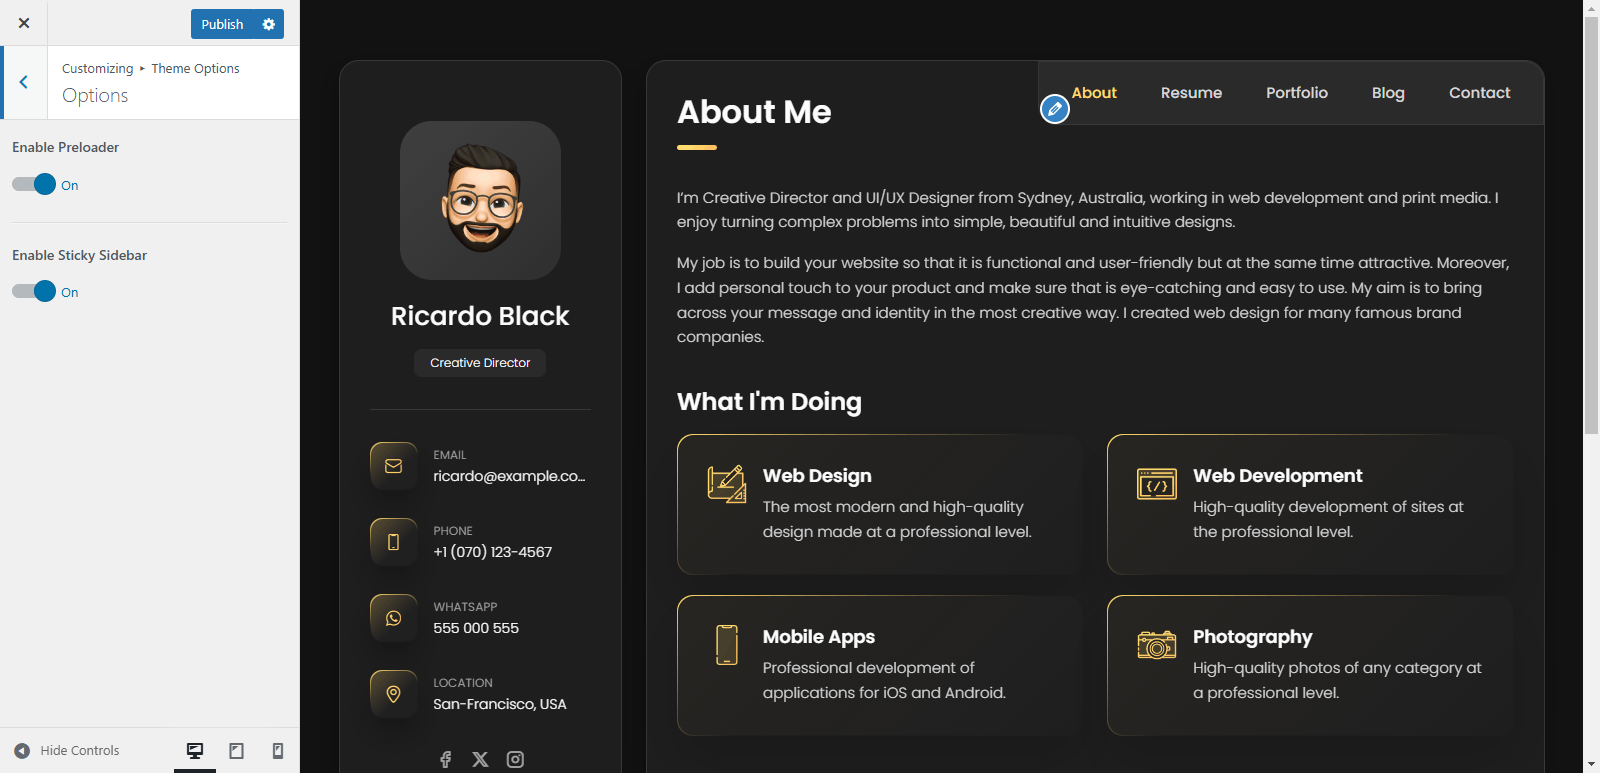
To get to the advanced theme settings, log in to wp-admin and go to DashboardAppearanceCustomizeTheme OptionsOptions
Enable Preloader - Enables/Disables the preloader that you can see when the page loads.
Enable Sticky Sidebar - Enables sticky sidebar.
Typography
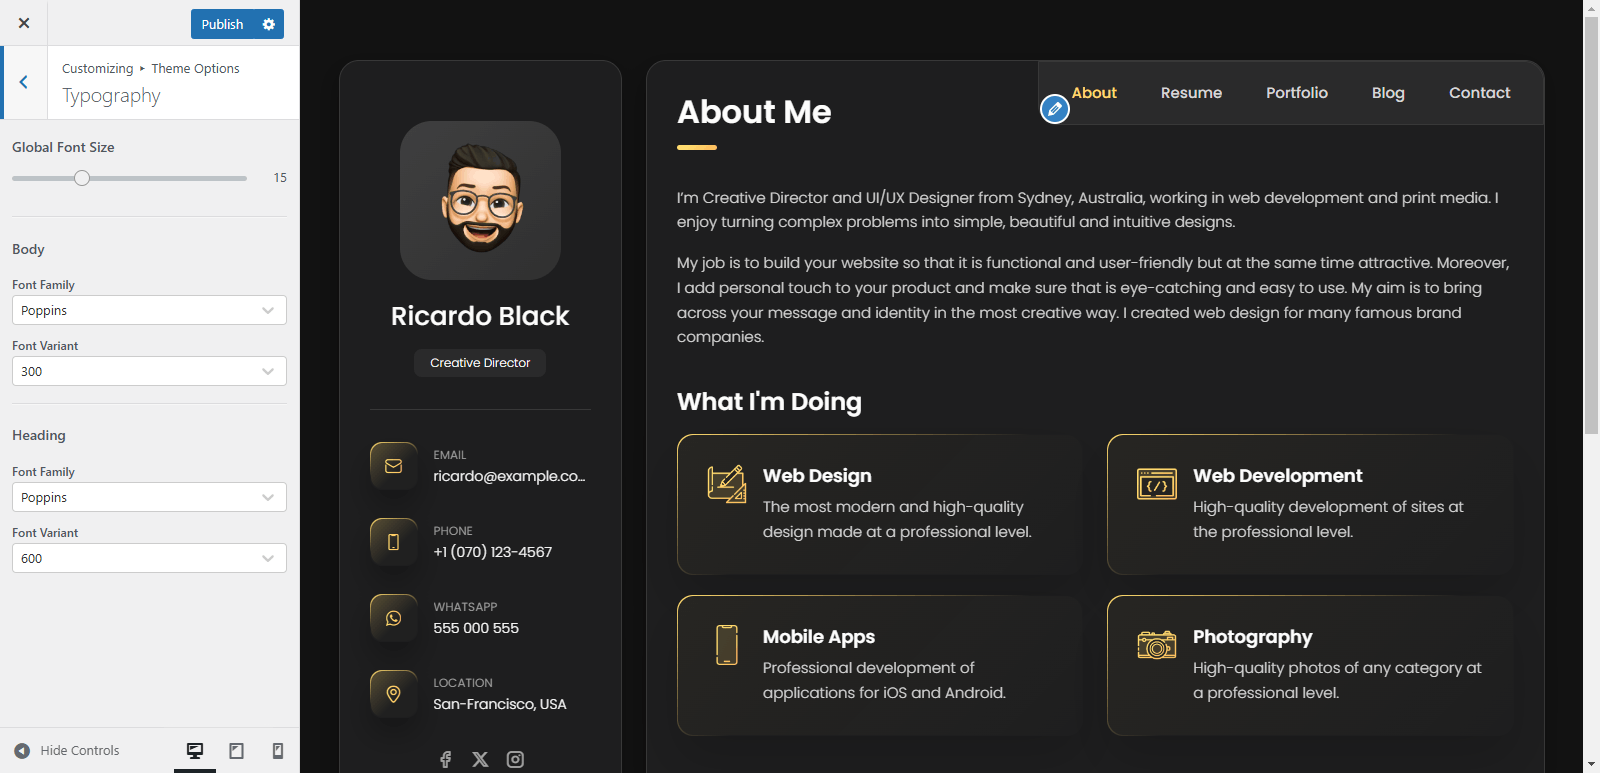
To customize the typography, go to DashboardAppearanceCustomizeTheme OptionsTypography
Blog
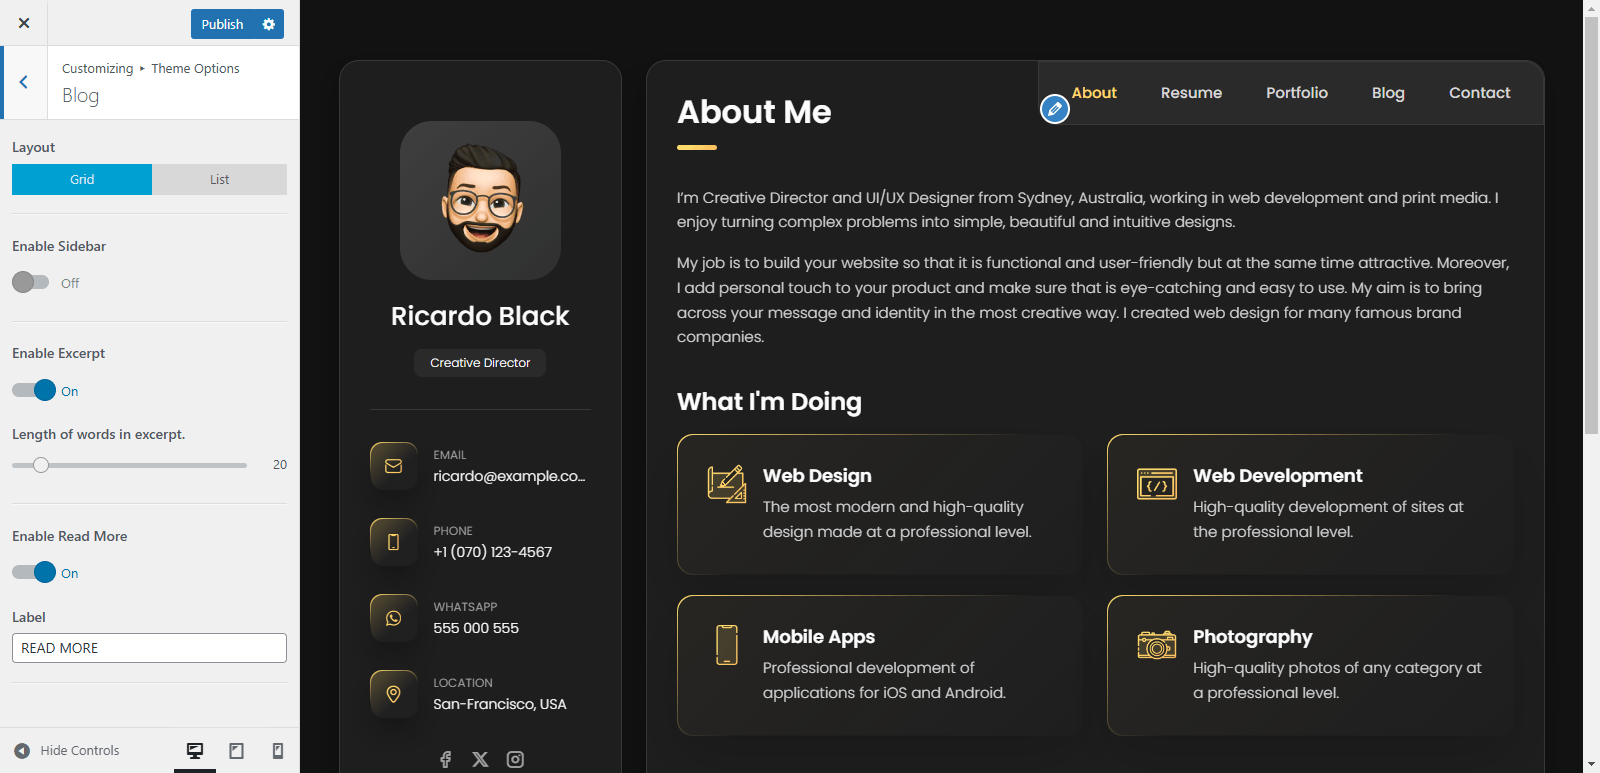
To set up your Blog go to DashboardAppearanceCustomizeTheme OptionsBlog
Layout - Sets the type of posts to display (grid/list).
Enable Sidebar - Allows you to show or hide Sidebar on the blog page.
Enable Excerpt - Allows you to show or hide excerpt in posts.
Enable Read More - Allows you to show or hide button "Read More" in posts.
Single Portfolio
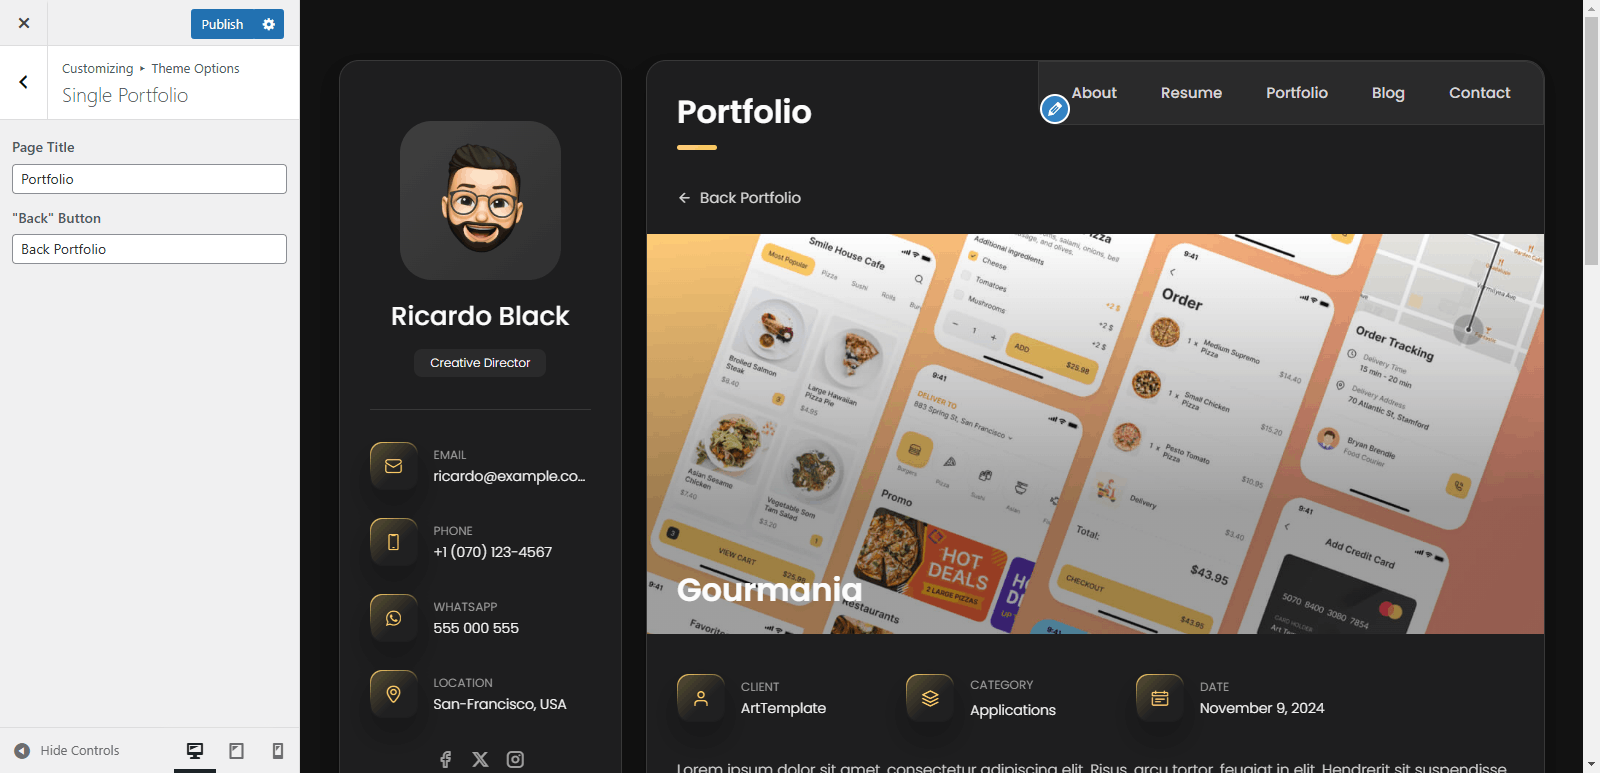
To set up your Single Portfolio go to DashboardAppearanceCustomizeTheme OptionsSingle Portfolio
Page Title - Sets the title of the single portfolio page.
"Back" Button - Sets the name of the back button.
Footer
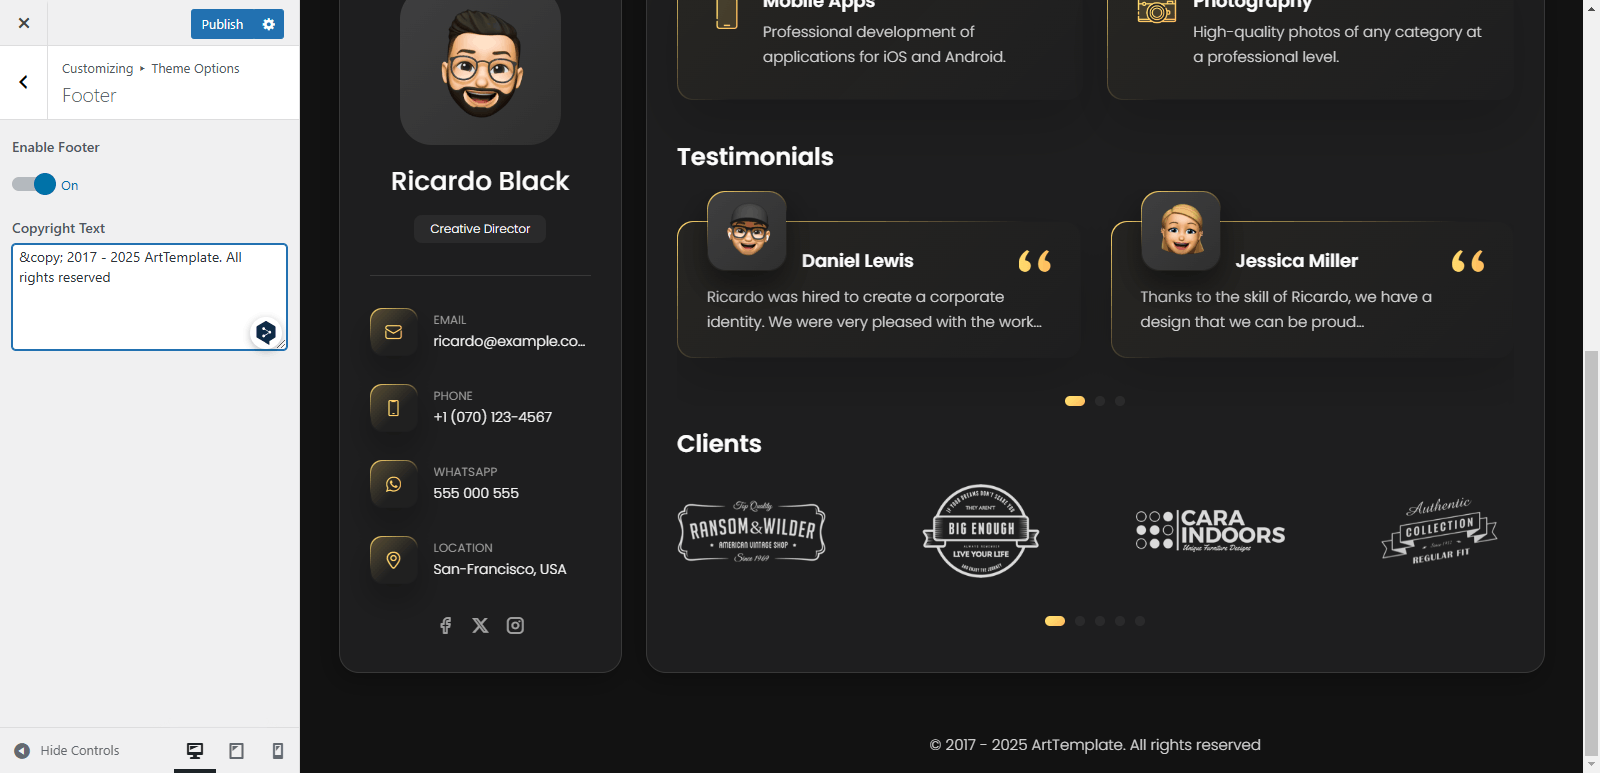
To set up your Footer go to DashboardAppearanceCustomizeTheme OptionsFooter
Enable Footer - Allows you to show or hide footer.
Copyright Text - Allows you to set the text for the footer.
404
To set up your 404 page go to DashboardAppearanceCustomizeTheme Options404
Load 404 Page - Allows you to go to the 404 page
Title - Title for the 404 page
Text - Text for the 404 page
Customize Menu
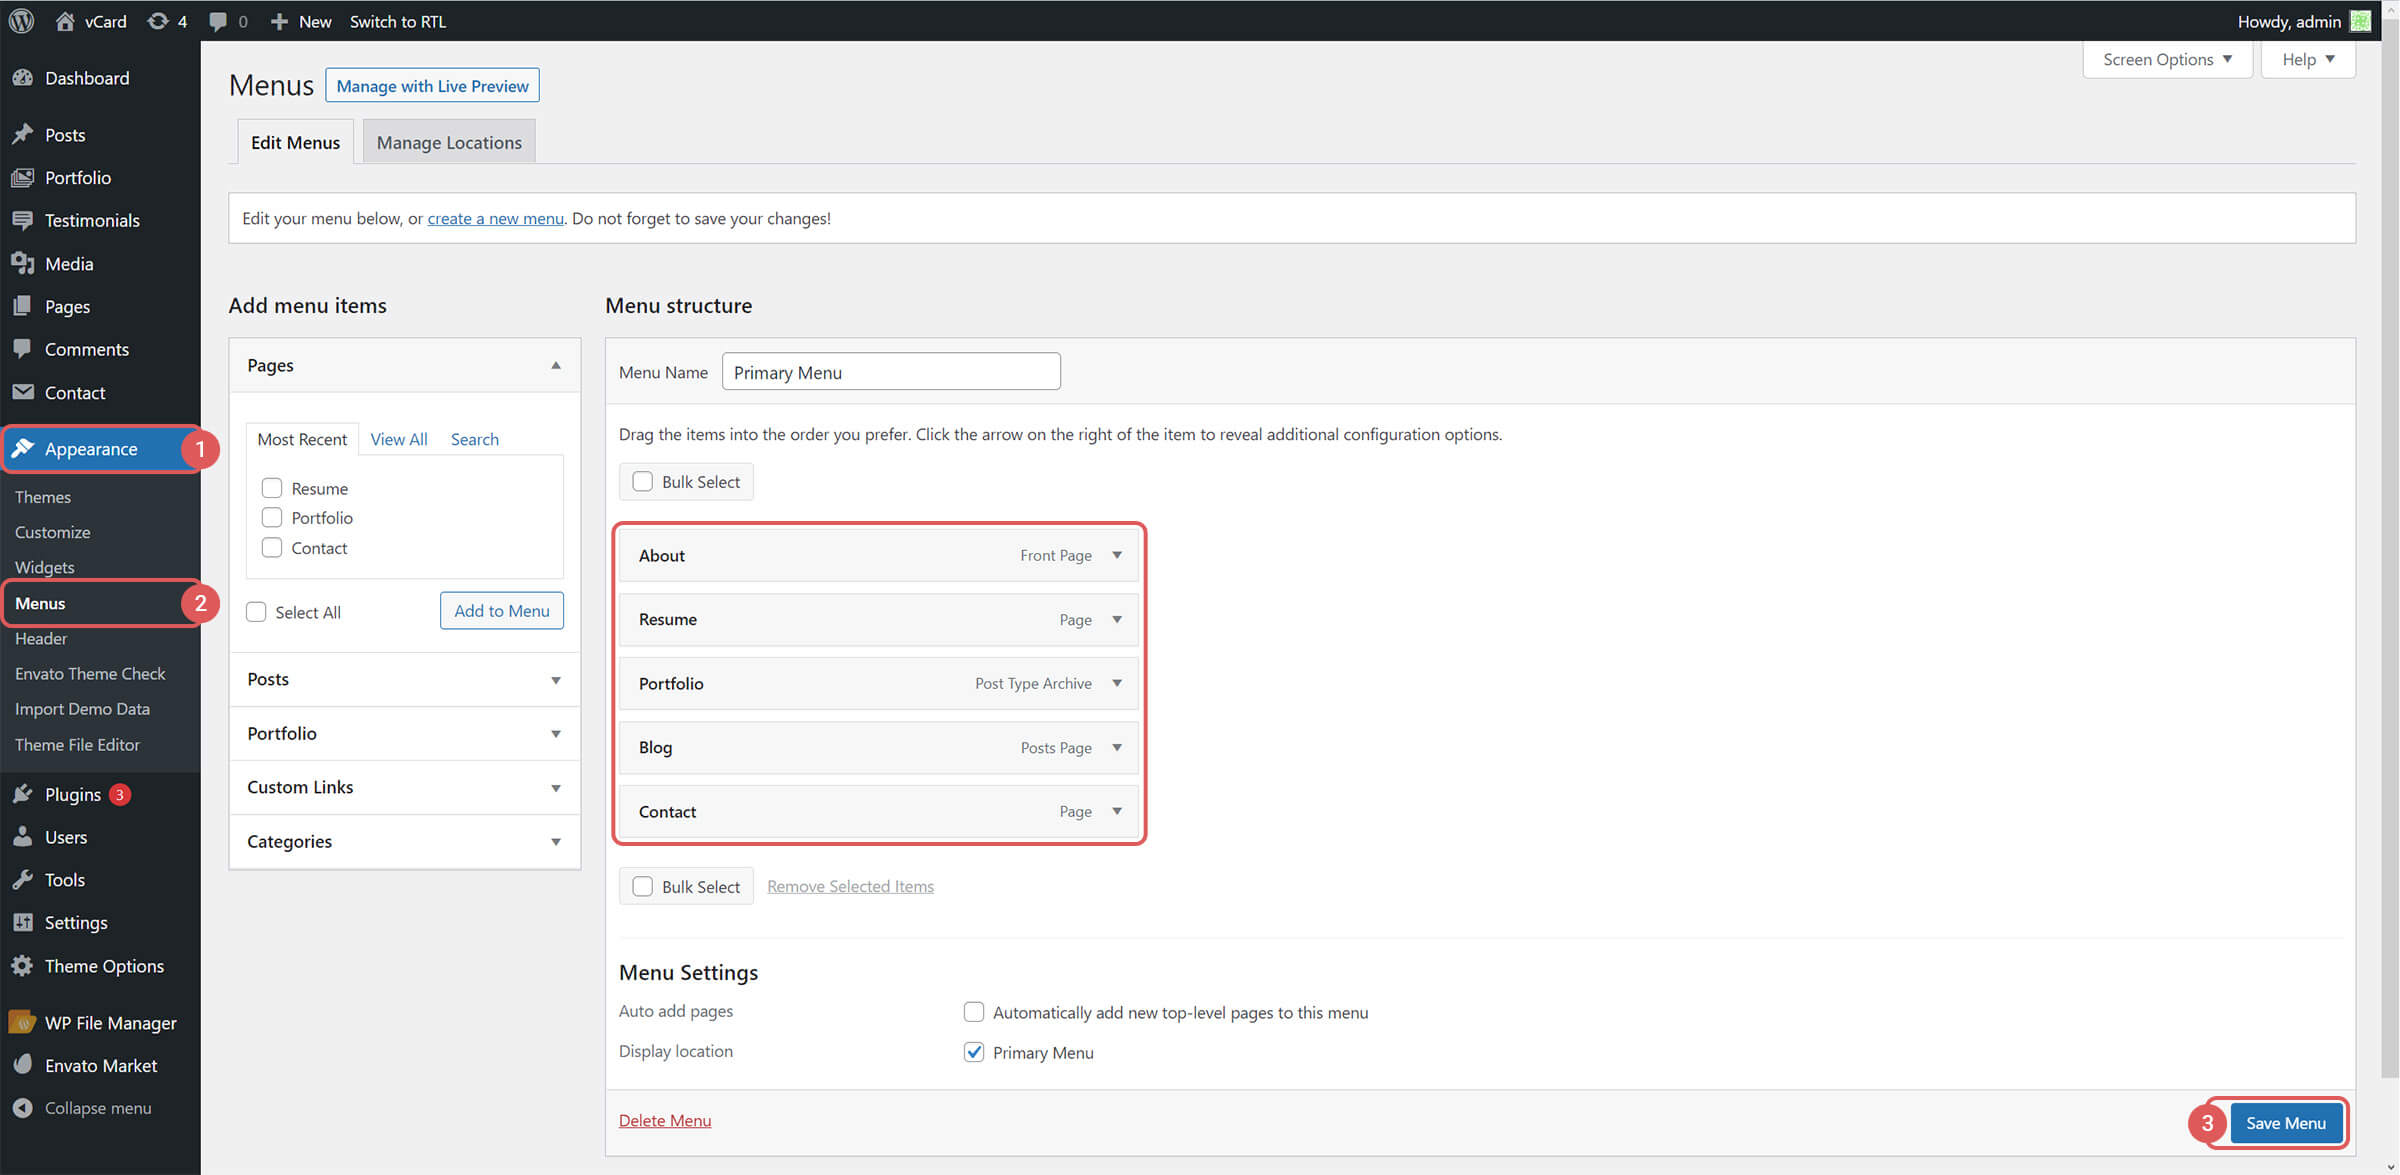
To set the menus, login to wp-admin and go to DashboardAppearanceMenusPrimary Menu
In this section you will be able to build your menu.
Portfolio
Creating a project
From the dashboard go to PortfolioAll ItemsAdd New
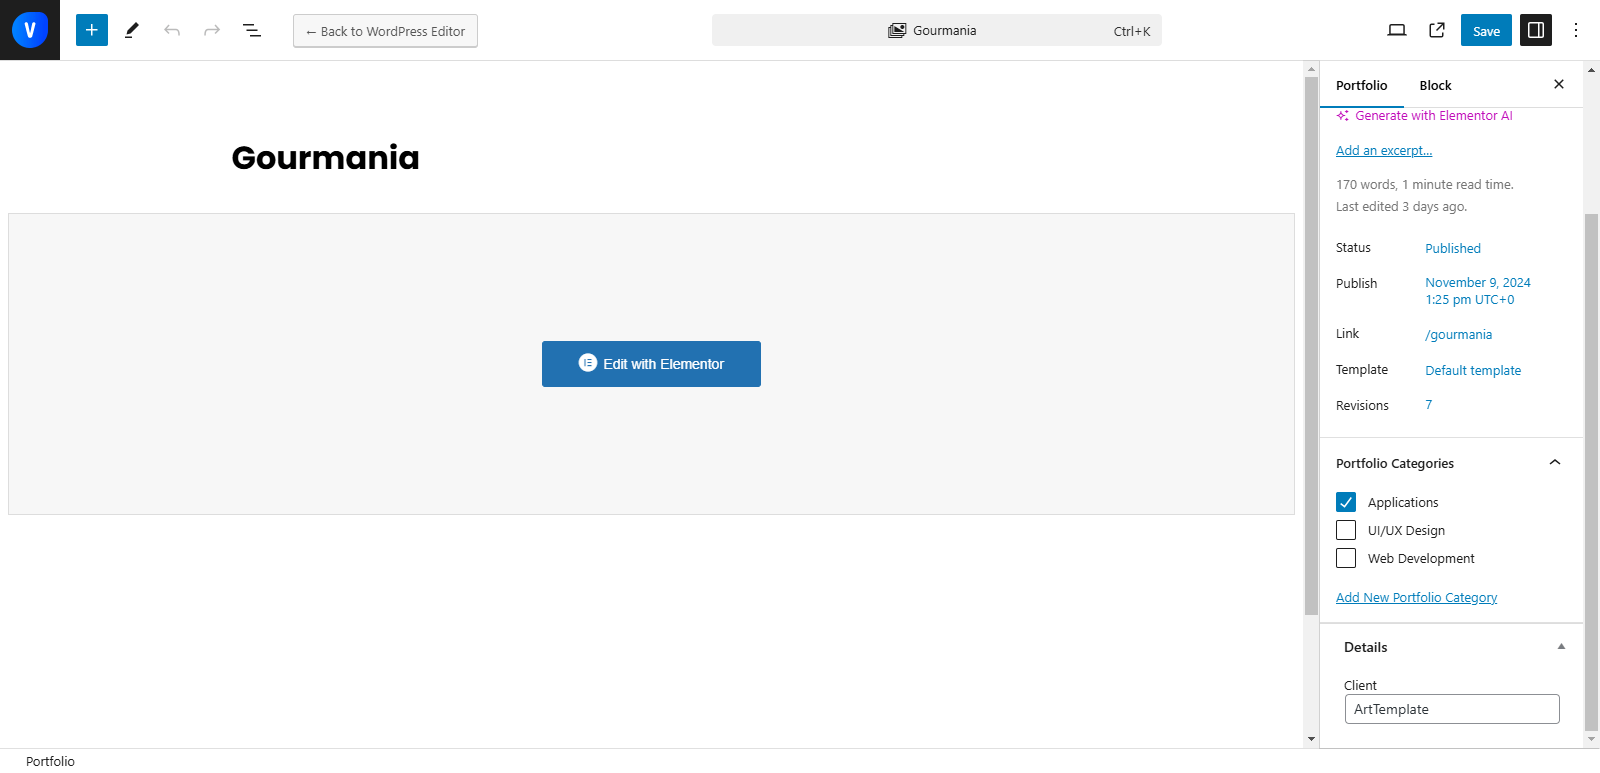
Adding content is divided into two parts. At the beginning, you add basic project data: title, category, project image, client (at the bottom of the sidebar under the categories). Next, you need to save the project, the "Save Draft" button (top, right), and then click on the "Edit with Elementor" button - this will take you to the page of the created project, where in design mode you can easily create unique pages for your projects .